Introduction to Webpack
Introduction
Webpack is a module bundler. Modules are like a small chunk of code that can be reused or distributed among other projects. Most of the programming languages have some sort of features that offers a way to partition code. Unfortunately, JavaScript doesn't have a built-in module system, except for, distributing code over different files. But fortunately, there are some standards available that we can use to create a module in JavaScript.
Some standards to define the module in JavaScript:
- CommonJS: A synchronous way to load modules. Node.js uses this module system.
- AMD(Asynchronous Module Definition): RequireJS is the most popular implementation.
- ES6 modules
Webpack supports all those module systems. By using webpack, the developer can choose their favorite module system. Webpack also makes it easy to add custom module styles. Webpack can also replace grunt/gulp as your only build tool. It also has Code Splitting feature which is very cool.
Lets get started
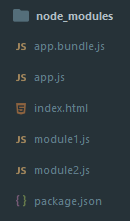
Let's say we have two JavaScript modules in our application and we want to load those in the correct order. We want module1.js to be loaded first and then we want to load module2.js. We will do something similar to this:
index.html
<!DOCTYPE html><html><body><script src="module1.js"></script><script src="module2.js"></script></body></html>
module1.js
console.log('This is module 1');
module2.js
console.log('This is module 2');
The problem is we are making two HTTP requests to load those two modules. Also, those modules can have their dependencies on other modules and we also want them to load in the correct order. This is where we would normally use a build tool like gulp or grunt to bundle those modules in a single file. However, in this case, we will use webapck to do the bundling for us.
So we want a single entry file that will eventually load other modules in the correct order.
Let's call that single entry file as app.js that requires module1 and module2
require('./module1.js');require('./module2.js');
and we need to reference app.js in our page that will eventually load module1 and module2:
<!DOCTYPE html><html><body><script src="app.js"></script></body></html>
Now, if you run this in the browser you will see the Uncaught ReferenceError: require is not defined error in your browser developer console. That's because if you look at app.js, we load module1 and module2 using CommonJS style which is not supported in the browser. It only works in the Node.js environment. This is the place where we need to use webpack so that it will transform/bundle those modules in a way that browser can understand.
Installing Webpack
Webpack is available through NPM. To get NPM you need to have node.js installed in your machine.
After installing node.js, now we need a pacakge.json file. open your terminal and type:
npm init --yes
This will generate a package.json file with some default configurations.
Now install webpack globally and also as your development dependency:
npm install -g webpacknpm install -D webpack
Now, let's bundle those modules by simply writing this:
webpack ./app.js app.bundle.js
So we tell webpack what is our source file and also the destination file. Webpack will create an app.bundle.js in your project root (this is also configurable).
Finally we have to reference app.bundle.js in html:
<!DOCTYPE html><html><body><script src="app.bundle.js"></script></body></html>
Getting Real
We only see how we can bundle modules. Webpack has much more advanced features. Almost everything is customizable. To gain access to those features we need a webpack.config.js configuration file that instructs webpack how to behave. Then we can simply run webpack command in the terminal and webpack will execute the instructions from the config file.
module.exports = {entry: './app.js',output: {filename: 'app.bundle.js'}};
The above code is the same as running webpack ./app.js app.bundle.js, but as you can see this is much more expressive than using the command line.
Using plugins
Plugins add functionality typically related to bundles in webpack. We use plugins using the plugins property in the webpack config.
var webpack = require('webpack');module.exports = {entry: './app.js',output: {filename: 'app.bundle.js'},plugins: [new webpack.optimize.DedupePlugin(),new webpack.optimize.UglifyJsPlugin({ mangle: false, sourcemap: false })]};
Webpack came with some built-in plugins. Here we are using the DedupePlugin and UglifyJsPlugin plugin. You can find a list of plugins here. If your run webpack command again you will see app.bundle.js is now minified.
Multiple entry points
You can also create multiple bundles for multiple HTML pages. So for example if you have two HTML pages pageA and pageB, for those you want to create individual bundles. You can do the following configuration in webpack.config.js:
var path = require('path');module.exports = {entry: {pageA: './pageA',pageB: './pageB'},output: {path: path.join(__dirname, 'dist'),filename: '[name].entry.js'}};
pageA.js
require.ensure(['module-a'], function(require) {var a = require('module-a');// ...});
pageB.js
require.ensure(['module-b'], function(require) {var b = require('module-b');// ...});
pageA.html
<html><body><script src="pageA.bundle.js"></script></body></html>
pageB.html
<html><body><script src="pageB.bundle.js"></script></body></html>
That's it for now. We only just touched some basic features of webpack. Webpack can do much more. To learn more about webpack go to the official docs.