Introduction To CodeIgniter Template Library
Today we are going to implement master page concept in our php application with a template library called CI template library by Colin Williams. Keep in mind that this is not a codeigniter tutorial or how to set up a codeigniter application type post. I am assuming that you are already familiar with codeigniter framework and wanted to use a template library.
What's Master Page
A master page defines the common structures and HTML markups that you need for all the pages of your web application. Its more like a centralized way to manage the shared components. For example, the header, footer, navigation menu etc are quite static and common in all pages. It also lets you specify some area or region that you can fill with the appropriate data based on the current route.
Required Tools
Setup the demo application
First step: Download the CI framework. Now extract the files and save them to a folder in your web server root directory. I am using wamp so my webserver root directory is C:\wamp\www.
Second Step: Download bootstrap. Now create a folder named "content" to the root of your application. Inside the content folder paste all the js, css and font folder that bootstrap gives you.
Third Step: Download CI template library. The template library package contains three files. The installation process is pretty straight forward. You will use only two files:
/libraries/Template.php: copy this file into YourApplicationDirectory/system/libraries//config/template.php: copy this file into YourApplicationDirectory/application/config//views/template.php: skip this file. we don't need it in this case
We can now use the template library in our CI application.
Configure CI Template Library
First open the YourApplicationDirectory/application/config/template.php file in your favorite text editor and set the value of $template['default']['template'] to this:
$template['default']['template'] = 'master-layout';
This is where you will specify the name of your default master layout or template (with or without the ".php" extension). In this case the library will look for a file master-layout.php in the views folder.
Under this you will find $template['default']['regions'] with some predefined regions. Regions are like placeholder within the main template where you can specify what content will be loaded. You can customize the name of the regions. For this demo app, we only need three regions:
$template['default']['regions'] = array('title','header','content');
Now, load the template library via YourApplicationDirectory/application/config/autoload.php
$autoload['libraries'] = array('template');
Also load the URL helper class. This is not required to work with template library. But we will use the CI’s built in base_url() function. So, we need to import this helper.
$autoload['helper'] = array('url');
Now, lets create a master layout. Create a file called master-layout.php under the views folder and paste the following html snippets:
<?php if (!defined('BASEPATH')) exit('No direct script access allowed'); ?><!DOCTYPE html><html lang=en><head><meta charset=utf-8><meta http-equiv="X-UA-Compatible" content="IE=edge,chrome=1"><title><?=$title?></title><link rel="stylesheet" href="<?=base_url('content/css/bootstrap.min.css')?>" /><style>.container { padding-top: 20px; }.content { min-height: 200px; }</style></head><body class="container"><header class="well"><h2><?=$header?></h2></header><div class="content well"><h3><?=$content?></h3></div><footer class="well well-sm"><h5>My Website footer.</h5></footer></body></html>
The above template contains three regions- title, header and content. Those are the regions that we specified in our template configuration file. At the moment they are blank. Lets fill those regions with the data.
Now, modify the default welcome controller that's shift with codeigniter:
<?php if ( ! defined('BASEPATH')) exit('No direct script access allowed');class Welcome extends CI_Controller{public function index(){$this->template->write('title', 'My Awesome Website');$this->template->write('header', 'My Awesome Article');$this->template->write('content', 'My Awesome Content');$this->template->render();}}
Template's write() method is the most basic way of writing content to a region. You have to provide at least two parameter in it.
- First parameter is the name of the region we want to write to
- Second parameter is the string that will be shown on that region
Finally, the render() method will render our template to the browser. Note that we no longer need $this->load->view(). The render method will automatically load the default template specified in the config/template.php file.
Caution: The render() method should be the last thing called from any public Controller methods that make use of this Template Library.
Now, lets say instead of some simple string that we passed through our controller to the view, we want to pass an array. This data may come from a web service or from a database. For the sake of this demo we will create some dummy data and pass them to the view for rendering.
We will use write_view() for this. The templates write_view() allows us to write an entire view to a region. Also we can pass an array of data using this method. Lets take an example.
Create a customer method inside the Welcome controller:
public function customer(){$data['customers'] = array("John" => "[email protected]","Ben" => "[email protected]","Joe"=>"[email protected]","Nina" => "[email protected]","Nasri" => "[email protected]");$this->template->write('title', 'Manage Customer');$this->template->write('header', 'All Registerted Customers');$this->template->write_view('content', 'welcome/customer', $data);$this->template->render();}
Note that, we are still using the same write method for title and header. Now, take a look to the write_view() method. The template will now try to load views/welcome/customer.php file into the content region.
Lets create that view. Make a folder called welcome under the views folder. And inside there create a file called customer.php
<table class="table"><thead><tr><th>Name</th><th>Email</th></tr></thead><tbody><?php foreach ($customers as $key => $value): ?><tr><td><?=$key?></td><td><?=$value?></td></tr><?php endforeach; ?></tbody></table>
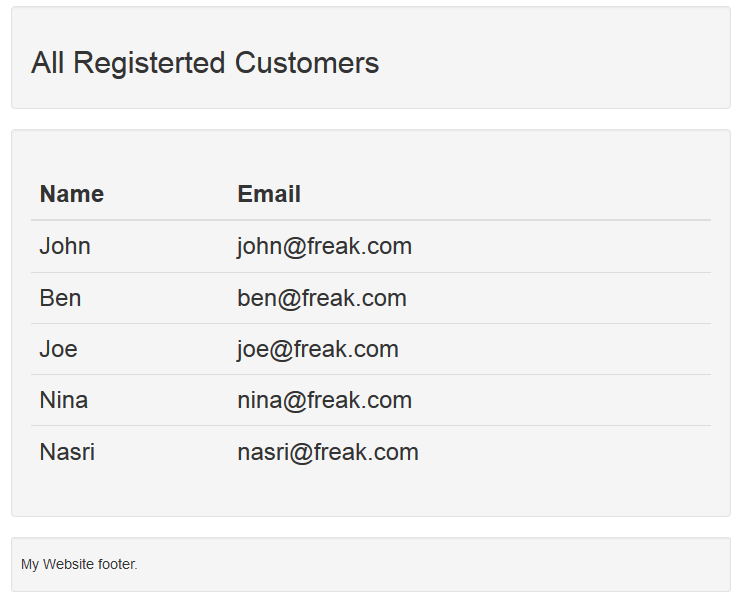
Now, if we browse /YourApplicationDirectory/index.php/welcome/customer we should see something like this:
Wrap up
OK. That's all for this post. There is lot more you can do with this library. For example, you can have multiple template files in your application and you can load them dynamically where you needed using $this->template->set_master_template(). Just read the documentation and you should be good to go. What I have showed here is the most basic way to integrate the CI template library in a CI application.
You can download the demo application from here.